Because people seem to be interested, here are the modifications I used to make my seamless, bottom up, seven button, semi-raglan version of
Mrs. Darcy, a wonderful pattern by
Mary Weaver.
Mrs. Darcy Modifications
by Riah Werner
Gauge was 4.5 st/inch, and the sweater wound up having a bust measurement of approximately 38 inches.
Instructions:CO 171 st.
Throughout the following, maintain a five stitch border of garter stitch on each side, and work a buttonhole every ten rows:
K 7 rows.
Work 19 rows St st.
Work 25 rows twisted rib. (I purled into the backs of stitches on the wrong side as well as knitting into the backs of stitches on the right side.)
Work 19 rows St st.
You should by now have worked 70 rows and have 7 buttonholes.
Begin neckline decreases:For each RS decrease row, k 5, ssk, k to last 7 st, k2tog, k5.
For each WS decrease row, you want your decreases to look the same from the front side as your RS decreases. What I did was k 5, p2tog, p to last 7 st, p2tog, k5, and then when I got to whichever decrease looked wonky on the RS, I fixed it so it slanted the right way before moving on. There's probably a simpler way to get symmetrical WS decreases, but I don't know what it is. Anyway, the goal is to have all of the decreases on the right edge leaning to the left and all of the decreases on the left edge of the piece slanting to the right, to make a nice, smooth decrease line, just within the five stitch garter border.
Decrease 1 st each side for the next 5 rows.
Decrease 1 st each side every other row 8 times.
Decrease 1 st each side.
Work 3 rows even.
At this point, it comes time to join the sleeves, so put aside the body of the sweater and knit the sleeves. You should have 143 sts.
Sleeves:CO 47 st. Knit the first and last stitches together to join in the round, joglessly.
Work 40 rnds twisted rib.
Work 12 rnds St st.
For each increase rnd, K1, M1L, K to the last st in the rnd, M1R, K1.
Work increase round every 12th round 6 times.
(So, work the increase round, and then knit 11 rnds even 6 times, for a total of 58 sts.)
K the first five st of the next round, and set sleeve aside. Make another sleeve, identical to the first.
Join Sleeves:Row 1: K 25, PM, place next 10 sts on scrap yarn, K 48 sts of one sleeve, PM place last 10 sleeve sts on scrap yarn, K 73 sts from body of sweater, PM, place next 10 sts on scrap yarn, K 48 sts of 2nd sleeve, PM, place next 10 st on scrap yarn, K 25 sts of sweater body.
You should now have 5 sts of border, 20 sts of right front, 48 sts of right sleeve, 73 sts of back, 48 sts of left sleeve, 20 sts of left front and 5 sts of border, with place markers between each section (except between the border and the front sections).
2 and all even rows, until otherwise stated: K 5 sts, P to last 5 sts, K 5 sts.
3:Decrease at the neck and on both sides of the markers at the armhole. K5, ssk, *K to 2 sts before marker, K2tog, sl marker, ssk* repeat until last marker, K to last 7 sts, K2tog, K 5.
5: Decrease at both sides of the armhole markers. *K to 2 sts before marker, K2tog, sl marker, ssk* repat until last marker, K to end.
7: Repeat row 3.
9: Repeat row 5.
11: Repeat row 3.
13: Repeat row 5.
15: Repeat row 5.
17: K to 1st marker, sl marker, ssk, K to 2 st before 2nd marker, k2tog, sl marker, ssk, k to 2 st before 3rd marker, k2tog, sl marker, ssk, k to 2 st before 4th marker, k2tog, sl marker, k to end.
19: Decrease inside the arm markers only. K to 1st marker, sl marker, ssk, k to 2 sts before 2nd marker, k2tog, k to 3rd marker, sl marker, ssk, k to 2 st before 4th marker, k2tog, sl marker, k to end.
21: Repeat row 19.
23: Repeat row 19.
25: Repeat row 19.
27: Repeat row 19.
29: Repeat row 19.
31: K to 1st marker, sl marker, ssk twice, k to 4 sts before 2nd marker, k2tog twice, k to 3rd marker, ssk twice, k to 4 st before 4th marker, k2tog twice, k to end.
32: K 5, p to 1st marker, sl marker, p2tog, p to 2 st before 2nd marker, p2tog, sl marker, p to 3rd marker, sl marker, p2tog, p to 2 st before 4th marker, p2tog, sl marker, p to last 5 st, k to end.
33: Repeat row 31.
34: Repeat row 32.
35: K to 1st marker, sl marker, ssk twice, k2tog twice, sl marker, k to 3rd marker, ssk twice, k2tog twice, sl marker, k to end.
36: Repeat row 32.
37: K 14, k2tog, ssk, k to 18 st from end, k2tog, ssk, k 14.
38: Place first 5 st on scrap yarn, p to last 5 st, place last 5 sts on scrap yarn.
Shoulders:Place first ten st on a dpn. Place next ten sts on a dpn. Work three needle BO. Repeat for the other shoulder, with the last 10 sts and next to last 10 sts in the row.
PU 4 sts at the shoulders on each side. Place these sts on the needle with the stitches from the back (which are still live and on the needle).
Neckline Edging:Work the five sts on one of the dpns in garter stitch, knitting the band together with the live stitches at the top of the back as follows.
1: K 4, K final st together with next stitch from the back.
2:K one st from the back together with first st on dpn, k 4.
Repeat rows 1 and 2 until there are no more back stitches left.
Graft the 5 sts on dpn together with the 5 sts on the other dpn.
Graft armpit seams. Work 2 rows of single crochet at the bottom edge, remembering to ch1 at the end of the first row before turning. If there are any funny little holes by the armpits seams or at the top of the shoudlers, sew them up when you weave in your ends.
Notes on adjustments:
When figuring out how many stitches to cast on, I thought of the sweater in five sections, 5 sts for the garter stitch edge on each side, 38 sts for each front sections and 85 sts for the back, which came to a total of 171 st, which at my gauge of 4.5 stitches to the inch gave me a finished sweater of 38 inches, my bust measurement. After the neck decreases, when it was time to join the arms, there were 20 stitches for each front section and 75 for the back, with the same five stitch garter edging on each side. The sleeve wound up the way they are because I wanted to work them seamlessly in the round, but with the look of set-in sleeves, rather than raglan ones, so they wound up a kind of funny hybrid, which I'm quite happy with.
If you have any questions about these mods or if anything doesn't make sense, PM me on Ravelry or send me an email at wakenda@gmail.com. Also, if you wind up making a sweater with them, I'd love to hear about it, so let me know.
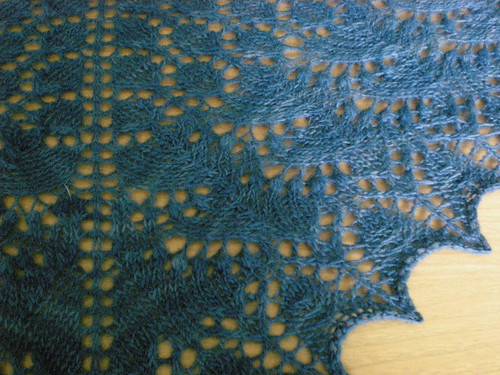 After this little beauty, I'm totally on a lace kick. Everything I'm queuing of late is lace, lace, lace. I even bought two more sizes of Addi Laces needles for it, because I loved them so much on this. There's pointy and the stitches never once slipped. It was pretty glorious.
 Pattern: Swallowtail Shawl by Evelyn A. Clark
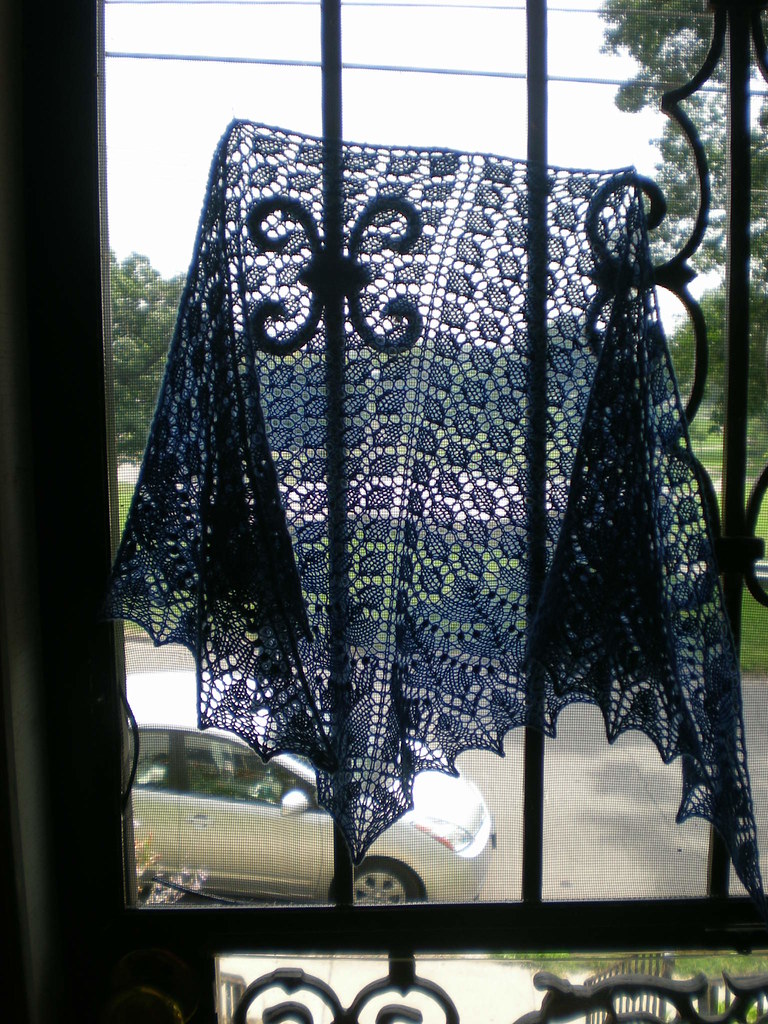 What made it even cooler, is that everything I used for it, I got from my awesome Mal Swap buddy, Lori. She sent me a lovely Magic Yarn Ball, full of all sorts of delightful goodies, including the yarn, pattern and needles. She did such a fantastic job picking out goodies for me, and I was definitely excited to cast on for it, that I knit the whole thing up in a jiffy.
 In addition to the yarn, pattern and needles for this shawl, she sent some Lion Wool Prints, an emory board, a little yellow bear tape measure, a set of mini natural soaps, a magic washcloth, two rubber stamps, one of which has a quote from Antony and Cleopatra on it, an aromatherapy patch, incense matches, a soak sample in Aqua, which I haven't tried yet, delicious tangerine hand cream, an Eat Sleep Knit ruler, and Eat Sleep Knit Lotto card, which I won a skein of smooshy on, and the most beautiful stitch markers ever, that she made herself. They have little green beads and crystals on them and they are so so pretty. I adore them and use them every chance I get. Plus, it was a set of thirteen that she sent, with one contrasting one, so I'll always have plenty of them. Really, I couldn't be happier with them. The whole swap, my first ever, was pretty cool. I had such a fun time putting everything together, and waiting for mine to get there, plus I got such an awesome, thoughtful package. The whole thing was great.
 Thank you Lori!
